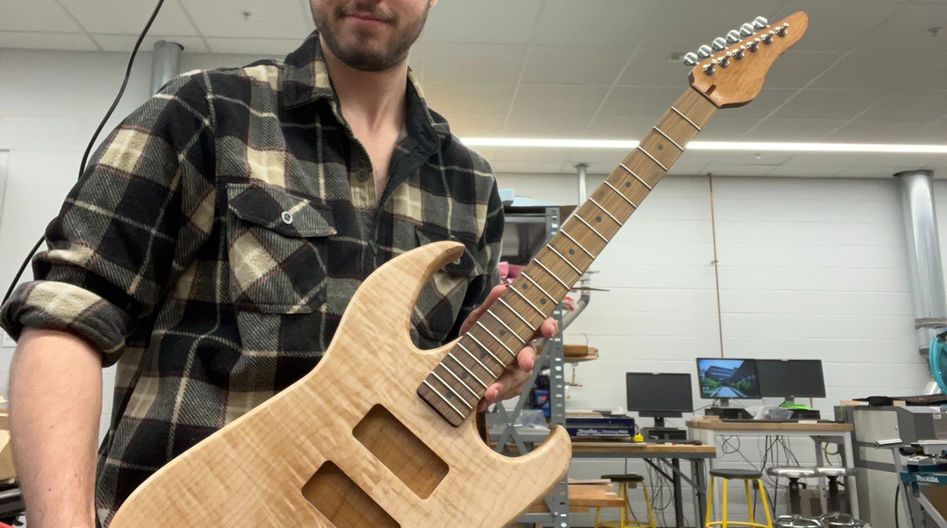
Custom Hand-Crafted Guitar
Going into my second to last semester at Purdue, I sought a project that would make me bridge the gap from fabricator to craftsman. While I had a good amount of carpentry experience working on rehabilitating houses and building sets for theatrical shows, I was comparatively new when it came to fine woodworking. Furthermore, my understanding of different types of wood extended only so far as "ply-" or "particle board." At the same time, a long-ignored desire to learn to play the guitar stirred once more. I had never had the chance to start learning as a guitar had always been well outside of my broke college student budget, and that's when it hit me! I should just make my own!
Once I had the idea, there was no turning back. I had found another way to marry my desire to learn something new with my need to create, and it just had to be done. After a lot of research, working with professors on campus, and enrolling in a Stringed Instrument Design course, the goal had solidified. I was going to design and craft an electric guitar up to modern musical standards that highlights the natural beauty of the woods I chose.
Not rocking the boat by any means, I chose mahogany for the neck, rosewood for the fretboard, and I fashioned the body of my guitar from alder. I specifically chose a piece that was just one-quarter inch too thin so that I could attach a beautiful piece of wavy maple that I found whose grain reminded me of the mountains I had fallen in love with during my time in Colorado the previous summer. I book-matched this sentimental piece and it became the front face of my guitar body. While my planned electronic setup was decidedly telecaster, I designed the body to resemble a stratocaster with two sharp horns because I thought they looked cool and heard were hard to get right (a natural challenge I had to take.) I used V-Carve to plot out the final basic dimensions of the body and neck and used a CNC router to cut out their basic shapes, including electronic pockets and a slot for the truss rod in the neck. After the basic shapes were cut out, I used a routing table to round the edges of the body and the rest was done completely by hand.
Finally getting my hands on what I had originally drawn on paper, I realized that a guitar doesn't just have to look right; it has to feel right. And so, I went on to spend tens of hours hand shaping, improving, and even flat out altering the design of my guitar. Shaping the neck in particular was a very enjoyable learning experience. I had no plan going into rounding the still fully rectangular back of the neck. So I marked a centerline, picked up a shinto saw rasp and some sand paper, and allowed the hard and stable mahogany to teach me. And after hours of shaping, feeling how it felt to hold, and reshaping, I was left with a smooth neck that fully matched the natural curve of my hand, something I had no clue I was capable of doing.
Once I had everything looking and feeling right, I shellacked and clear coated the body and neck and gave the fretboard a nice oil treatment. I then put everything together and wired up the sensitive aoucustic grade electronics excitedly testing my two pickups for "more guitar per guitar" as I liked to call it. Making sure everything was perfectly in place took a lot of time and care, but it was worth it to hear the crisp and smooth tones that came from it once I had it strung, intonated, and tuned.
Fall - 2023


